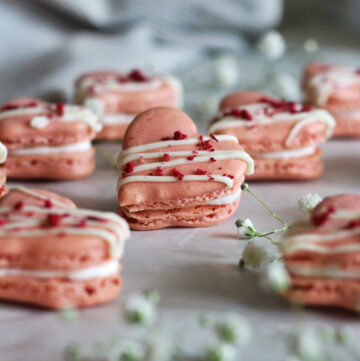
Guava Macarons with Coconut Buttercream
Enjoy tropical flavors in a bite-sized cookie! If you cannot find guavas, feel free to use guava jelly from the store. I made them in heart shapes for Valentine's Day but they are delicious year round :)
Equipment
- Kitchen scale
- Heart template (see notes)
Ingredients
Macaron Shells
- 130 g super fine almond meal, blanches
- 225 g powdered sugar
- 115 g egg whites, room temperature (about 3-4 eggs, see notes)
- 60 g caster sugar (see notes)
- pink food coloring, optional (see notes)
Homemade Guava Jam
- 2 cups guava pulp/puree (see notes)
- 2 Tbsp fresh lime juice (about 1-2 limes)
- 1/2 cup cane sugar
Coconut Buttercream
- 1/2 cup unsalted butter, room temperature
- 3 cups powdered sugar
- 3 Tbsp heavy cream
- 1/2 tsp coconut extract
For topping (optional)
- 1/2 cup white chocolate, melted
- 1/2 cup freeze-dried raspberries
Instructions
For the shells:
- Pulse almond meal and powdered sugar in a food processor for about one minute. Scrape down sides and bottom of the bowl as needed so everything is evenly mixed.
- Place a fine sieve over an aluminum bowl. Have other aluminum bowl handy. Sift almond meal mixture three times- back and forth between the two bowls. If you have less than a tablespoon of the dry mixture that is too large to pass through the sieve, you can discard it. Anything greater than 1 tablespoon should be reground in the food processor and then sifted. Set aside.
- Place egg whites in the bowl of an electric mixer fitted with the whisk attachment. Whisk until foamy. Slowly add caster sugar while continuing to whisk. Keep whisking on speed for about 5 minutes until you get "stiff peaks." This means that your meringue will be able to stick straight up and you can hold the whisk attachment upside down without it dripping off. Careful not to whisk too much (or at high speeds) because that would add too much air to the batter. Add food coloring (if using) and mix on low until combined.
- Using a spatula, carefully fold the dry ingredients into the bowl with the meringue. It works best if you do this in 3 batches. Fold from the bottom to the edges of the bowl in a J-shape. Do not stir or whip (you want the dry ingredients to slowly melt into the wet ingredients). Keep folding until you get a "ribbon-like" texture (smooth, glossy, thick). DO NOT OVERMIX or your batter will become runny. It is better to undermix! You can test when it is done by putting a little spoonful on parchment- if it keeps the shape and is stiff, mix a little bit more. If it spreads slightly, it might be done. I think this is the hardest part of making macarons. You might have to test a few batches before you get the "intuition."
- Once the batter is properly mixed, transfer it to a piping bag with a round 1/2" tip.
- Start piping the batter either onto a parchment lined pan (I put the heart stencil under the parchment paper). Start from the top of the heart and move to the bottom of the heart, using more pressure towards the top. Quickly flick the piping tip away from you to cut off the batter. This may leave a small peak which will either melt down on its own or when you bang the pan (more on that later). Use a toothpick to make the points of the heart a little pointy.
- Gently drop your pan on the countertop (about 4 inches) in order to release air bubbles and smooth over the tops. This will help prevent them from cracking. Set aside in a dry area for 30-40 minutes in order to dry and create a skin. This will be challenging if it is humid where you are. You can try using a fan.
- While the shells are drying, preheat your oven to 300 degrees F.
- When the oven is ready, bake shells for 6 minutes. Open the oven door slightly to rotate the pan 180 degrees without fully removing the pan from the oven. Bake for another 4-8 minutes. Time will vary depending on your oven. You can tell the shells are done when the top is firm and the "foot" doesn't wiggle when you touch the top. Try taking one off the paper. If it sticks, keep baking. If they peel off easily, they are done.
- Remove from oven and let them cool completely on the pan before transferring them to a cooling rack. Set aside.
To make the guava jam:
- Put 4-5 small plates in the freezer. You will use these for your plate tests (see notes).
- Combine the guava, lime juice, and sugar in a small non-reactive pot or saucepan. Bring the mixture to a boil. Continuously stir to prevent burning. Start your first plate test after 10 minutes. Continue plate tests every 5 minutes or so. Keep boiling until you reach your desired consistency (around 20-30 minutes). Remove pot from heat. Transfer jam to a heat-safe container. Allow to cool.
To make the buttercream:
- Whisk the butter in the bowl of your stand mixer fitted with a whisk attachment for about a minute. Add powdered sugar one cup at a time, mixing on low speed until incorporated, scraping down the sides of the bowl as needed. Add coconut extract and heavy cream. Whisk on high for 2 minutes. Add more cream if it seems too stiff. Add more powdered sugar if it seems too soft.
- Transfer buttercream to a piping bag with a 1/2" piping tip. Set aside until ready to assemble.
To assemble:
- There may be some natural variation in the size/shape of the shells. Try to match them up with a partner of similar size and shape.
- Pipe buttercream around the circumference of the shell, making a heart, and leaving some room around the edges. The buttercream makes a "dam" for the filling. Note that you only have to pipe half of the shells with buttercream. The other half of the shells will be "lids" that you place on top.
- Spoon about 1/4 tsp of guava filling into the center of the shells. You might have to use more or less filling depending on the size of your shells. Place the matching lid on top and gently sandwich together.
- These macarons are served best the day they are made. You can also place in an airtight container in the refrigerator for 2-3 days or in the freezer for a month. Let come to room temperature before serving.
Notes
- Here is the link to the heart template I used. I used the 1.5" size and I thought they were plenty big! https://www.piesandtacos.com/heart-shaped-macarons-video-template/
- The egg whites need to be at room temperature. For best results, place your egg whites into a small bowl and loosely cover for 1-2 days before using.
- Caster sugar is a superfine sugar. I always make it at home by pulsing regular granulated sugar in a food processor until it is… superfine. Make sure to weigh your sugar after processing it because you may lose some of it in the process.
- I used 1 drop of Americolor Deep Pink and 2 drops of Dusty Rose.
- You can get guava puree from Maui Fruit Jewels: https://www.mauifruitjewels.com/collections/hawaii-fruit-purees
- For more information on plate tests and making jam, check out this post: https://anchoredbaking.com/homemade-tayberry-lemon-jam-canning-101/#wprm-recipe-container-697